Surfshark VPN is a popular virtual private network service known for its enhanced online privacy and security. Boasting over 3,200 servers in 65 countries, it offers users fast and reliable connections for browsing, streaming, and torrenting. To learn more about its features and performance, check out my in-depth Surfshark review. With a strict no-logs policy and robust encryption techniques, Surfshark ensures your online activities remain private while supporting unlimited simultaneous connections, making it an ideal choice for families and small businesses.
Now, if you’re looking to uninstall it, I’ve created this comprehensive guide to help you uninstall Surfshark VPN on various platforms, including Windows 10, Windows 11, macOS, Android, and iOS. I’ve personally tested these methods, so rest assured that you’ll find reliable and effective solutions for removing Surfshark VPN from your device, no matter which platform you’re using. Let’s dive right in!
Please note, that uninstalling Surfshark will now cancel your active subscription. If you want to cancel subscription, check out my detailed guide on how to cancel Surfshark subscription.
How to uninstall Surfshark on Windows 10
To remove Surfshark from Windows 10, you can use either the built-in uninstallation function or a third-party uninstaller tool.
Build-in uninstallation function
Here is a step-by-step guide on how to remove Surfshark on Windows 10 via built-in uninstallation function:
- Close the Surfshark application: Make sure the Surfshark app is closed before starting the uninstallation process. If it is running in the system tray, right-click the Surfshark icon and select “Quit.”
- Open the Control Panel: Click on the Start menu (Windows icon) in the lower-left corner of your screen, and type “Control Panel” in the search bar. Click on the Control Panel app to open it.
- Access the Programs and Features: In the Control Panel, click on “Programs” or “Programs and Features,” depending on your view mode.
- Find Surfshark in the list: Scroll through the list of installed programs to find Surfshark.
- Uninstall Surfshark: Right-click on Surfshark in the list, and select “Uninstall” from the context menu that appears. This will initiate the uninstallation process.
- Follow the prompts: The Surfshark uninstallation wizard will appear. Follow the on-screen instructions to complete the uninstallation process.
- Manually remove leftover files and folders (optional): After uninstalling Surfshark, you may want to manually delete any remaining files or folders related to the app to ensure a complete uninstallation. To do this, open File Explorer and navigate to the following locations:
- C:\Program Files (x86)\SurfsharkC:\Users<YourUsername>\AppData\Local\Surfshark
- Restart your computer (optional): To finalize the removal process and clear any cached data, it’s a good idea to restart your computer.
After completing these steps, Surfshark should be fully uninstalled from your Windows 10 system.
How to uninstall Surfshark on Windows 11
Here are the step-by-step instructions to uninstall Surfshark on Windows 11:
- Make sure that the Surfshark program is completely quit and stopped on your PC. You can do this by right-clicking the Start menu, selecting Task Manager, selecting Surfshark program, and clicking End task.
- Open the Start menu and choose Settings.
- Select “Apps.”
- Locate Surfshark in the list of installed apps.
- Click on Surfshark and select “Uninstall.”
- Follow the prompts to complete the uninstallation process.
- After that, you can manually delete any remaining files or folders related to Surfshark to ensure a complete uninstallation.
- Restart your computer.
If you encounter any issues during the uninstallation process, you can try using a third-party uninstaller tool to scan and remove any leftover files or registry entries.
Third-party uninstallers
If you prefer using third-party software for uninstallation or you encounter any problems during the uninstallation process, you can opt for a reputable uninstaller tool like Revo Uninstaller or IObit Uninstaller. These tools can help you thoroughly remove Surfshark, including any leftover files and registry entries. Simply download and install the uninstaller tool, then follow its on-screen instructions to locate and remove Surfshark from your system. Using a third-party uninstaller can ensure a more comprehensive removal and potentially save time compared to manual file and registry cleanup.
How to uninstall Surfshark on macOS
Using built-in uninstallation process
There are several methods for uninstalling Surfshark on macOS. One approach is to utilize the app’s built-in uninstallation process. To do this, click “Go” in the top menu and choose “Applications”. Locate the Surfshark folder and double-click its uninstall process. Follow the prompts to finish the uninstallation.
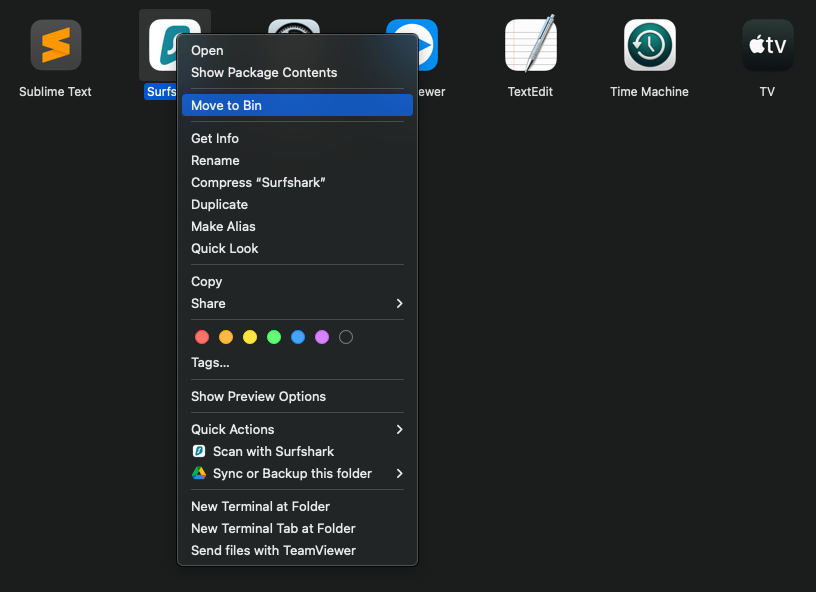
Using Trash bin
If you don’t see a folder with Surfshark, you can right-click the Surfshark icon in the Dock and select “Quit” from the pop-up menu. Then, drag the Surfshark application icon to the Trash bin. A small pop-up will appear; click “Delete” to confirm the deletion.
Removing leftover files after the uninstallation
After uninstalling the app, it is advised to manually remove any remaining files, folders, or associated items to fully uninstall Surfshark on Mac. To eliminate residual files after uninstalling Surfshark, manually remove any leftover files, folders, or related items connected to the app. Visit Apple Support to learn more about removing apps and their associated files on macOS.
On macOS, verify that Surfshark has been deleted from Login Items by navigating to Apple menu > System Preferences > Users & Groups > the username > Login Items. If the app is still present, proceed to the Hide pane and click the “–” button to remove it. Then, manually delete any remaining files or folders associated with Surfshark to ensure a thorough uninstallation.
If you experience difficulties during the uninstallation process, consider reaching out to customer support or seeking solutions on forums. Furthermore, if you wish to reinstall the Surfshark application on macOS, first find the app and drag its icon to the Trash bin. A small pop-up will appear; click “Delete” to confirm the deletion. Next, download the app from the Surfshark website and follow the installation prompts.
How to remove Surfshark on iOS
To uninstall Surfshark on iOS, press and hold the Surfshark app icon until it begins to wiggle. Next, tap the “X” icon in the top-left corner of the app icon. A pop-up will appear, inquiring if you wish to remove the app. Choose “Delete App” and then tap “Delete” to confirm. This will eliminate the app from your iOS device. If you’d like to reinstall the Surfshark app on iOS, simply download it from the App Store and follow the provided installation instructions.
How to remove Surfshark on Android
To remove Surfshark VPN on Android, you can follow these steps:
- Open “Settings” on your device.
- Click on “Apps.”
- Tap “See all apps.”
- Find the Surfshark VPN app and tap on it.
- Tap “Uninstall” and then confirm the action.
After completing these steps, Surfshark VPN will be removed from your Android device. If you encounter any issues during the uninstallation process, you can contact Surfshark support for assistance.
In conclusion, removing Surfshark VPN from your device, whether it’s Windows, macOS, Android, or iOS, can be accomplished with just a few simple steps. Each platform has its own uninstallation process, and by following the appropriate method, you can successfully remove Surfshark from your device. Remember to check for any leftover files or folders and delete them for a complete uninstallation. If you decide to reinstall Surfshark in the future, simply visit the respective app store or website, and follow the installation prompts.